
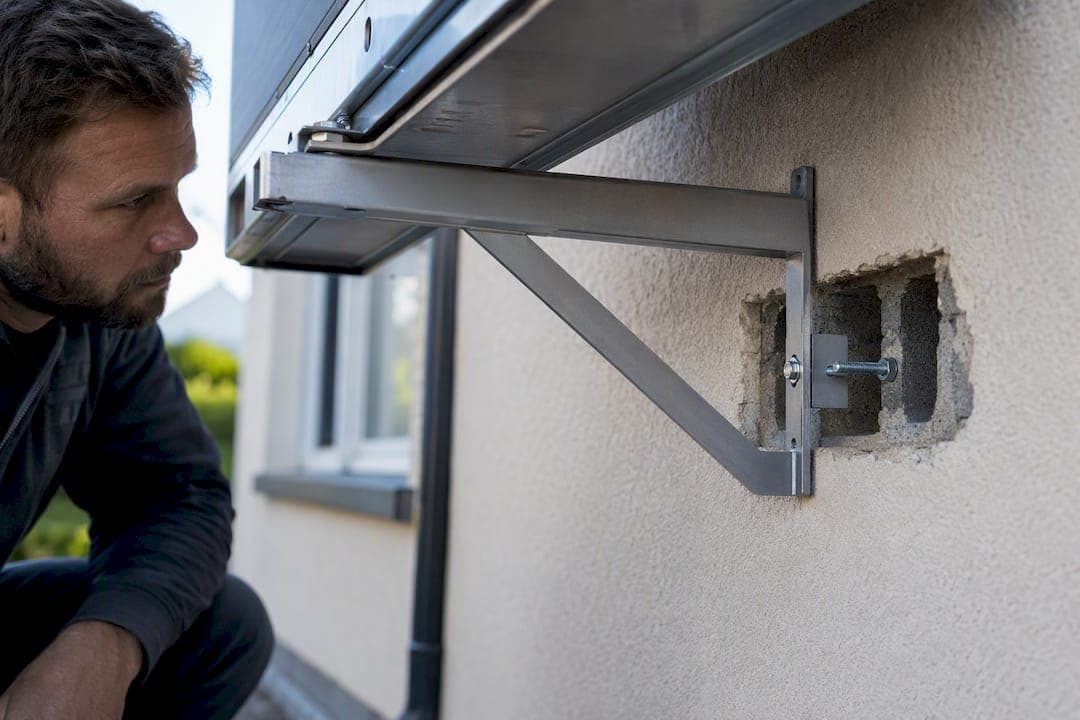
Wall mounting is the right call for most domestic outdoor units, provided the wall can carry the load and you can still hit the manufacturer's clearance figures. The single biggest failure point is often the wall behind the bracket: hollow block without proper backing frequently causes installation failures. Measure the unit and wall, buy a bracket rated well above the unit's weight, and book a certificated installer for anything involving refrigerant or mains electrics.
TL;DR:
- Use a bracket rated well above your outdoor unit's weight and ensure the wall can support it, especially if it is hollow or lacks proper backing.
- Check the manufacturer's clearance figures for airflow and access, positioning the unit where maintenance is easy and airflow is not obstructed.
- Confirm the wall's structural integrity and use appropriate anchors based on the wall material, avoiding improvisations that could fail later.
- Keep condensate drains clear, raise the unit above snow lines, and secure it with tie-downs in exposed or windy locations to prevent damage.
- Handle refrigerant and electrical connections only with certified professionals to comply with UK law and avoid costly mistakes.
Table of Contents
- What is an outdoor unit wall bracket, and when should you use one?
- How do you choose the right bracket and fixings?
- What clearances does an outdoor unit need around it?
- How do you mount an outdoor unit step by step?
- How do you stop water, ice and wind damage?
- When do you need a certificated installer for refrigerant or electrical work?
- What does a good installer check before mounting a unit?
- An installer's view on the mistakes that cost homeowners money
- Get a survey booked with Frost Air Conditioning
- Sources
- FAQ
What is an outdoor unit wall bracket, and when should you use one?
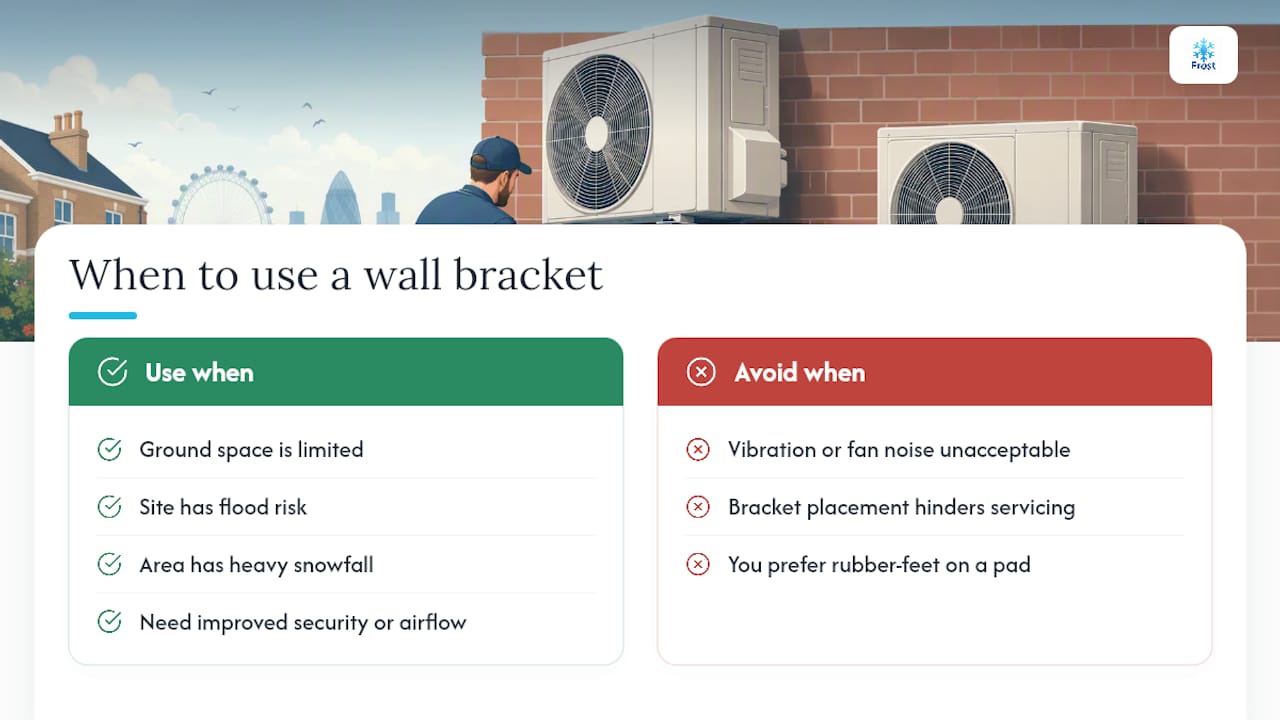
A wall bracket is a steel frame, usually a shelf or dual‑arm design, bolted into masonry or a structural wall, to hold the condenser clear of the ground. Some come with anti‑vibration kits built in; others need rubber isolation pads added separately.
They earn their place where ground space is tight, where flood risk or heavy snowfall makes ground‑level siting risky, or where lifting the unit improves security and airflow away from fences and bins. A homeowner's guide to outdoor units covers the basic components worth knowing before you commit to a fixing method.
The trade-off is real. A wall‑mounted unit transfers vibration and fan noise into the building fabric far more readily than a unit standing on rubber feet on a concrete pad, and a badly placed bracket can make routine servicing awkward for whoever climbs a ladder to reach it.
How do you choose the right bracket and fixings?
Bracket load rating comes first. Manufacturer manuals typically specify that the supporting structure needs to be significantly stronger than the unit's actual weight, not just match it, so check the installation manual for your specific model before buying anything. Merchant listings for galvanised steel brackets rated to a stated kg load are a useful sense check, though they never replace the manual's own clearance and torque figures.
Material matters more than most buyers expect:
- Coastal or exposed sites need galvanised or stainless steel, not painted mild steel, which corrodes at the weld points within a couple of seasons.
- Anchors must suit the actual substrate. Masonry, dense concrete, hollow blockwork, and timber framing all need different fixings, and manuals commonly reference M8 or M10 bolt sizes as a baseline.
- Anti‑vibration pads or isolation mounts between bracket and unit cut down structure‑borne noise considerably, particularly on lightweight block walls.
Pro Tip: Never improvise a fixing because the "right" anchor isn't in stock. A slightly delayed job beats a bracket that works loose in eighteen months.
What clearances does an outdoor unit need around it?
Airflow is the whole point of the outdoor unit, so crowding it defeats the system before it's even switched on. Installation manuals set out minimum clearances for the rear, sides, front, and above the unit, and these figures genuinely vary by model, so treat any number here as a starting point and check your own manual rather than a rule of thumb.
Three things routinely go wrong on site:
- Units angled so the hot discharge blows straight at a neighbour's window, washing line, or prized shrubs.
- Brackets fitted so close to a wall return that recirculated warm air drags efficiency down within weeks.
- No thought given to how an engineer will actually reach the panel for a future service visit or filter clean.
Position the unit so an engineer can stand in front of it comfortably, not wedged behind a drainpipe. That single decision saves every future callout a headache.
How do you mount an outdoor unit step by step?
This is the sequence a competent DIYer can follow up to a clear point, and where the line sits before certificated work takes over.
- Check the wall structurally. Confirm it's solid masonry or a properly backed frame, not a single skin of hollow block, and dry‑mark the bracket holes against the unit's actual foot spacing before drilling anything.
- Fit anchors for the substrate. Use the correct diameter and depth for masonry, concrete, or blockwork, then level the bracket with a spirit level before final tightening to the torque the fixing manufacturer specifies.
- Secure the unit to the bracket. Fit anti‑vibration pads between unit and bracket, then check the condensate drain path is completely unobstructed once the unit is seated.
- Stop there if refrigerant or electrics are involved. Breaking into refrigerant pipework, brazing joints, and making the final electrical connection are certificated tasks, not DIY ones.
A fuller walkthrough with photos of each stage sits in Frost Air Conditioning's step-by-step mounting guide.
Pro Tip: Dry‑fit the bracket and unit first, walk away, and check it again an hour later. Loaded brackets sometimes reveal a slight lean that's invisible the moment you tighten the last bolt.
How do you stop water, ice and wind damage?
Drainage problems are quiet until they aren't. If a bracket or spacer sits too close to the unit's drain holes, condensate backs up and freezes solid in cold weather, cracking plastic housings that then need replacing. Keep the outlet clear, and where the manual calls for it, fit a drain extension or a raised foot spacer so the drain never rests flush against a solid surface.
- Fit waterproof plates only within the distance the manufacturer specifies, and never let one restrict airflow around the coil.
- In areas that see regular snowfall, raise the unit above the typical snow line, since manuals consistently warn that coil damage follows from units sitting too low.
- On exposed walls or rooftops, add tie‑down cables or straps sized to the site's wind exposure, not just the standard bracket fixings.
Blocked or poorly ventilated discharge air causes the same efficiency drag as bad airflow indoors. The logic is similar to attic ventilation problems, where trapped air undermines a system that was otherwise specified correctly.
When do you need a certificated installer for refrigerant or electrical work?
UK law is unambiguous here: handling a refrigerant circuit, including breaking into one to connect pipework, requires valid F‑Gas certification. There's no DIY workaround, and no competent installer will let you attempt it.
Final electrical connection to the mains needs to meet UK wiring regulations, which in practice means a qualified electrician signs it off. Beyond the legal line, there's a practical one too: heavy or awkward mounts, rooftop access, or any job where the wall's structural adequacy is in doubt are all better handed to a professional. Ask to see F‑Gas and REFCOM credentials before anyone touches a refrigerant line. Frost Air Conditioning's guide to F‑Gas compliance checks sets out exactly what to ask for.
What does a good installer check before mounting a unit?
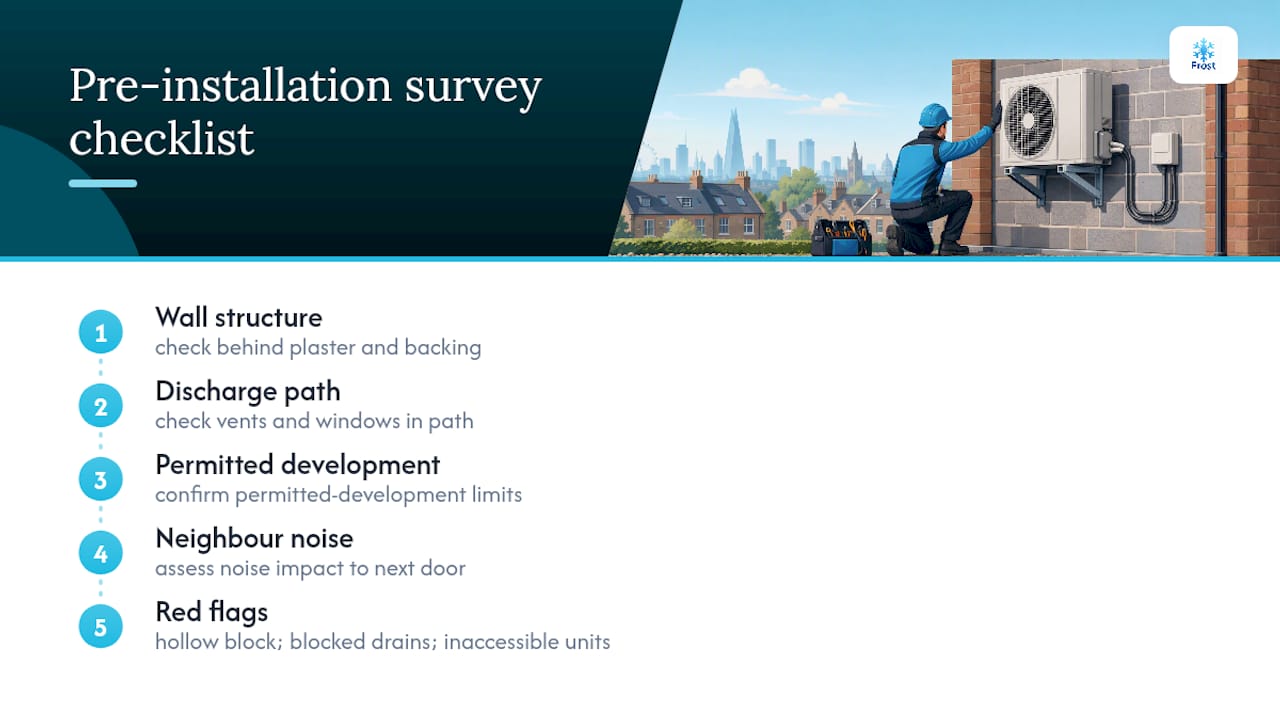
A proper site survey looks past the wall itself: what's behind the plaster, whether nearby vents or windows sit in the discharge path, whether permitted development limits apply, and how the unit's noise will read to next door. The red flags installers spot immediately are hollow block with no backing plate, drain outlets already blocked by the mounting position, and units squeezed somewhere no engineer could realistically service. Surveys are conducted by F‑Gas certified installers, and same‑day installation is often available once a survey confirms the wall is suitable.
An installer's view on the mistakes that cost homeowners money
Most callouts trace back to two things: nobody checked what was behind the wall, and nobody thought about where the condensate would actually drain once the bracket went up. Both are avoidable with five minutes of care before drilling starts.
If there's one habit worth adopting, it's this: dry‑fit everything, step back, check it again, and then hand the refrigerant and electrical connection to a certificated installer rather than guessing at the last stretch. That handover point is where most of the expensive mistakes happen, and it's entirely preventable.
— James
Get a survey booked with Frost Air Conditioning
Hiring a professional installer is a practical alternative to piecing this job together yourself from a manual and a merchant listing.

If you've already measured your wall and picked a likely bracket, the next step is getting someone qualified to check the substrate and sign off the refrigerant connection properly. Have the unit's make and model, plus the proposed wall location, ready when you get in touch, and book a domestic installation survey to get a firm answer on whether your wall and chosen bracket will actually work together.
Sources
- Qualifications required to work on equipment containing F‑gas
- DRA1HXXS1A ODU installation manual
- Condensing unit installation & service reference (Goodman)
FAQ
Is it legal to install AC in the UK?
Yes, installing air conditioning is legal in the UK, but any work involving the refrigerant circuit legally requires F‑Gas certification. Mounting brackets and structural fixing can often be handled by a competent DIYer, but connecting pipework and mains electrics cannot.
How much clearance does an outside AC unit need?
Clearance requirements vary by model, with manuals typically specifying separate minimum distances for the rear, sides, front, and above the unit. Always check your specific installation manual rather than assuming a standard figure applies.
Can I install an AC outdoor unit myself?
You can safely handle the bracket fixing, wall preparation, and physical mounting yourself if the wall is structurally sound. Breaking into the refrigerant circuit and making the final electrical connection must be done by a certificated F‑Gas installer and a qualified electrician.
How do I mount an outdoor AC unit onto a wall?
Check the wall's structural capacity, dry‑mark the bracket against the unit's foot spacing, fit anchors suited to the substrate, and level the bracket before tightening to torque. Once the unit is secured with anti‑vibration pads fitted, a certificated installer completes the refrigerant and electrical connections.
Do I need a certificated installer for a wall bracket job?
Not for the bracket and fixings themselves, but you do for anything touching the refrigerant circuit or mains wiring. Frost Air Conditioning's F‑Gas compliance guide explains exactly which credentials to ask an installer for before work starts.