Aircon placement step by step is the process of correctly positioning both your indoor and outdoor air conditioning units to deliver reliable cooling, efficient energy use, and a long service life. Get it wrong and you face water leaks, warm spots, higher electricity bills, and a warranty that may not cover the damage. Get it right and a single-zone split system can be fully operational within a single day. This guide covers every stage of the air conditioning setup process, from choosing the right wall to commissioning the finished system, written specifically for homeowners in the UK.
What are the best locations for indoor and outdoor units?
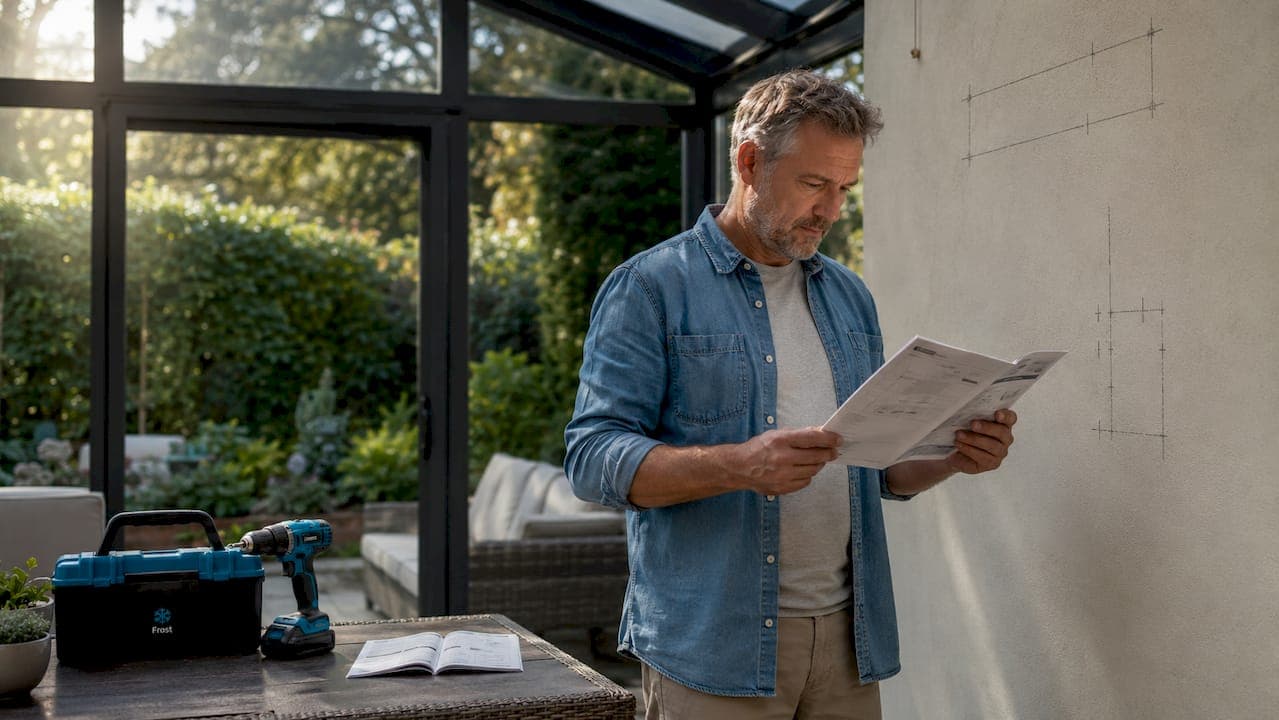
The single most important decision in any air conditioner installation guide is where each unit goes. A poor location costs you comfort and money every day the system runs.
Indoor unit placement
The indoor unit should be mounted 2 to 2.5 metres above the floor on an exterior wall. This height allows cool air to fall naturally across the room while keeping pipe runs short. Mount it too low and the airflow skims across the floor. Mount it too high and you lose the benefit of natural air circulation.
Leave at least 15 cm of clearance between the top of the unit and the ceiling. Obstructions above the unit restrict airflow and force the system to work harder. Avoid positioning the unit so that it blows air directly onto where people sit or sleep. Constant direct airflow causes discomfort and can trigger health complaints over time.
Choose a wall away from direct sunlight, heat sources such as ovens or radiators, and any source of steam. North or east-facing walls are preferable in UK homes because they receive less solar heat gain through the day.
Outdoor unit placement
| Clearance requirement | Minimum distance |
|---|---|
| Rear wall clearance | 30 to 45 cm |
| Side clearance | 30 to 60 cm |
| Overhead clearance | 5 feet (approx. 1.5 m) |
| Distance from shrubs or fences | 24 to 36 inches |
The outdoor condenser needs room to breathe. Insufficient clearance causes the unit to recirculate its own hot exhaust air, a problem known as short-cycling. Short-cycling shortens compressor lifespan significantly and drives up running costs. Keep the unit away from bedroom windows to reduce noise disturbance, and never position it where it discharges hot air towards a neighbour's window or boundary.
A north or east-facing wall is again preferable outdoors. Shade reduces the thermal load on the condenser and improves efficiency during summer. Avoid placing the unit in a confined alcove or behind a fence panel, no matter how tidy it looks aesthetically.
Pro Tip: If you are still deciding which unit to buy before planning placement, the right unit size for your room is just as critical as where you put it.
What preparation is needed before starting your installation?
Before any drilling or mounting begins, preparation determines whether the job goes smoothly or becomes an expensive rework.
Tools and materials to have ready
- Spirit level (for mounting the backplate accurately)
- Stud finder (to locate joists and avoid cables in the wall)
- Core drill and 65 to 75 mm hole saw bit
- Tape measure and pencil
- Appropriate safety gear: goggles, dust mask, gloves
- Pipe insulation and conduit for line sets
- Isolator switch rated for the unit's electrical load
Legal requirements you cannot skip
In the UK, refrigerant handling is regulated under F-Gas legislation. Only engineers holding a valid F-Gas certificate are permitted to handle, recover, or charge refrigerants. Unlicensed refrigerant handling carries fines exceeding £26,000. That figure alone makes the case for using a certified installer rather than attempting the full job yourself.
Electrical connection to the mains supply must be carried out by a qualified electrician or a Part P registered contractor. Confirm your consumer unit has capacity for a dedicated circuit before purchasing the system.
Permits are rarely required for a standard domestic split system in England, but always check with your local planning authority if you live in a listed building or conservation area.
Early-stage home renovations are the best opportunity to plan pipe and cable routes discreetly inside walls and ceilings. If you are mid-renovation, mark out your preferred locations now before plasterboard goes up.
Pro Tip: Read the certified installation steps for your specific unit model before buying fixings. Backplate dimensions and pipe entry points vary between manufacturers.
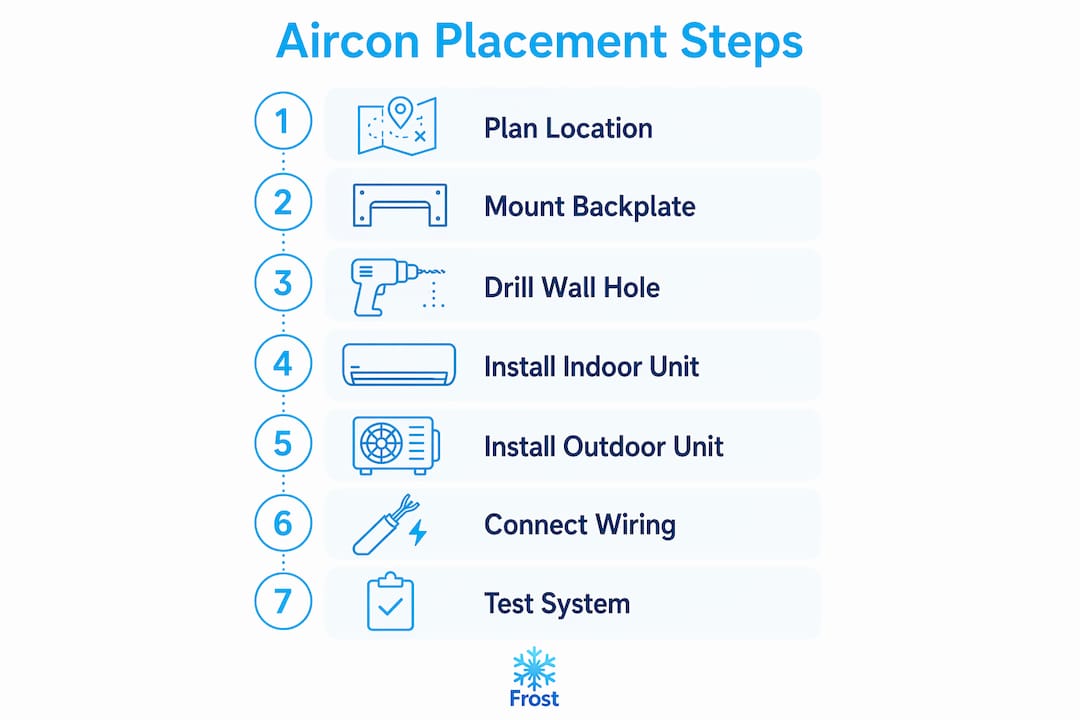
How do you install an aircon unit step by step?
This is the core of the aircon installation process. Follow these stages in order. Steps involving refrigerant or mains electrical work must be carried out by certified professionals.
-
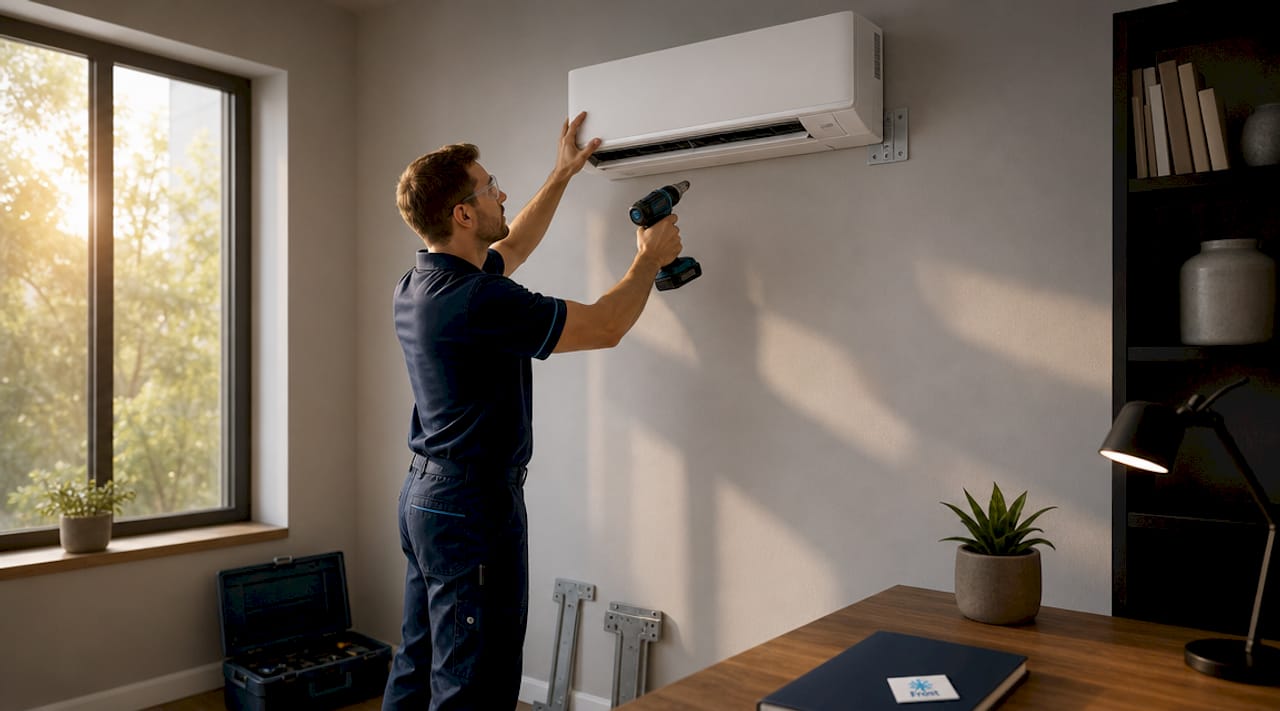
Mark and fix the indoor backplate. Hold the backplate against the wall at the correct height and use a spirit level to confirm it is perfectly horizontal. Mark the fixing holes, drill into the wall studs or use appropriate cavity fixings, and secure the plate firmly.
-
Core drill the wall penetration hole. Drill a 65 to 75 mm hole through the exterior wall at a slight downward angle toward the outside. The downward angle is not optional. It allows condensate water to drain away by gravity rather than pooling inside the wall.
-
Prepare and route the line set. Feed the refrigerant pipes, drain hose, and electrical cables through protective conduit. Route them through the wall hole and down to the outdoor unit position. Keep bends gradual to avoid kinking the copper pipes.
-
Mount the outdoor condenser. Fix the condenser onto a level concrete pad or a purpose-made wall bracket. The unit must sit perfectly level. Use anti-vibration mounts or rubber feet to reduce noise transmission into the building structure.
-
Connect the line set to both units. This step requires a certified F-Gas engineer. Flaring the copper pipe ends and coupling them to the indoor and outdoor units must be done correctly to prevent refrigerant leaks. Vacuum evacuation to below 500 microns removes moisture from the system before refrigerant is released. Moisture contamination is one of the leading causes of premature compressor failure.
-
Connect the electrical supply. Wire the isolator switch within line of sight of the outdoor unit, then connect the supply cable. This work must be completed by a qualified electrician.
-
Commission and test the system. Power up the unit and run it in cooling mode. Check for unusual noises, confirm the condensate drains freely, and verify the system reaches the set temperature within a reasonable time.
| Installation stage | Who carries it out |
|---|---|
| Backplate mounting and drilling | Competent homeowner or installer |
| Refrigerant line flaring and coupling | F-Gas certified engineer only |
| Vacuum testing and refrigerant charging | F-Gas certified engineer only |
| Mains electrical connection | Qualified electrician or Part P contractor |
| Final commissioning and test | Certified installer |
Pro Tip: A same-day installation is achievable for a standard single-zone split system when the site survey is completed in advance and all materials are on hand.
What mistakes should you avoid when placing your air conditioner?
Even a well-chosen unit underperforms when placement or installation errors creep in. These are the most common problems Frostairconditioning sees on remedial visits.
-
Incorrect tilt on the wall hole. If the core-drilled hole runs level or slopes inward, condensate water leaks back into the wall cavity. The damage is slow, invisible, and expensive to repair.
-
Outdoor unit placed too close to walls or planting. Anything within the minimum clearance distances restricts airflow around the condenser. The unit short-cycles, the compressor wears faster, and your electricity bill rises.
-
DIY refrigerant and electrical work. Warranty protection is invalidated when refrigerant line coupling or electrical connections are made by uncertified persons. Beyond the warranty risk, unlicensed refrigerant handling is a criminal offence under UK F-Gas regulations.
-
Airflow aimed directly at occupants. Positioning the indoor unit so the airstream blows straight onto a sofa, bed, or desk creates discomfort and complaints. Angle the louvres or reposition the unit to allow indirect circulation.
-
Failing to plan pipe routes before finishing walls. Surface-mounted conduit is functional but visually intrusive. Planning pipe routing during a renovation saves significant cost and looks far better.
-
Leaving no maintenance access. Both units need periodic filter cleaning, coil inspection, and servicing. If the outdoor unit is boxed in or the indoor unit is hemmed in by furniture, routine maintenance becomes difficult and gets skipped.
"The most avoidable call-outs we attend involve condensate leaks from a poorly angled wall hole and outdoor units surrounded by overgrown hedging. Both problems take five minutes to prevent and hours to fix after the fact."
How do you verify a successful installation and keep it running well?
Commissioning is not the end of the process. A few checks immediately after installation and a simple maintenance routine will protect your investment for years.
Checks to carry out after installation
- Confirm the condensate drain is flowing freely and discharging in the correct location outside.
- Listen for any rattling, hissing, or unusual vibration during the first run cycle.
- Verify the isolator switch is accessible and clearly labelled.
- Check that refrigerant pressures fall within the manufacturer's specified range. Your certified installer should record these at commissioning.
- Confirm the room reaches the target temperature within the expected timeframe for the unit's rated output.
Ongoing maintenance to protect performance
Clean the indoor unit's air filters every four to six weeks during periods of heavy use. A blocked filter reduces airflow, forces the system to work harder, and can cause the evaporator coil to ice over. Book a professional service with a qualified engineer at least once a year. During a service visit, the engineer checks refrigerant levels, cleans the coils, inspects electrical connections, and tests drainage.
If you notice a drop in cooling output, unusual odours, or water dripping from the indoor unit outside of normal condensation, contact a certified technician promptly. These symptoms rarely resolve themselves and usually worsen if left unattended. Frostairconditioning offers ongoing service and maintenance across the South West for exactly these situations.
Pro Tip: Improving general home ventilation alongside your aircon installation reduces the load on the system and improves air quality throughout the property.
Key takeaways
Correct aircon placement requires precise unit positioning, certified handling of refrigerants and electrics, and a clear maintenance routine to protect both performance and warranty.
| Point | Details |
|---|---|
| Indoor unit height | Mount 2 to 2.5 metres above the floor on an exterior wall for best airflow and short pipe runs. |
| Outdoor unit clearance | Maintain 30 to 45 cm rear clearance and 24 to 36 inches from shrubs or fences to prevent short-cycling. |
| Certified work is non-negotiable | Refrigerant handling and mains electrical connection must be carried out by qualified, certified professionals. |
| Wall hole angle matters | Drill the penetration hole at a slight downward angle to allow condensate to drain by gravity and avoid wall damage. |
| Maintenance sustains performance | Clean filters every four to six weeks and book an annual professional service to maintain efficiency. |
What I have learned from years of aircon installations in UK homes
The single most consistent mistake I see homeowners make is treating aircon placement as an afterthought. They choose the unit, buy it, and then decide where it goes based on where the nearest socket is or which wall looks tidiest. That approach almost always creates a compromise: a pipe run that is longer than it needs to be, an outdoor unit wedged into a corner with no clearance, or an indoor unit blowing cold air directly onto the sofa.
The second thing I have learned is that the refrigerant and electrical stages are where well-intentioned DIY projects go wrong in ways that are genuinely dangerous. I have attended properties where a homeowner has attempted to couple the refrigerant lines themselves, and the system has been running with a slow leak for months. The compressor is usually damaged by the time we arrive. The warranty is void. The repair cost exceeds what a professional installation would have cost in the first place.
What I would tell any homeowner reading this is to plan placement before you buy the unit. Walk the room, identify the exterior wall, think about where the outdoor unit will sit, and check the clearances before you commit. If you are mid-renovation, now is the time to route the pipes inside the wall. If you are not, accept that surface conduit is the trade-off and plan its route carefully.
Trust the certified steps for the parts that require certification. The mounting, the drilling, the conduit routing: these are genuinely within reach of a competent homeowner. The flaring, the vacuum test, the refrigerant charge, and the mains connection are not. That distinction is not about gatekeeping. It is about protecting your home, your warranty, and your safety.
— James
Get your aircon installed correctly by Frostairconditioning

Frostairconditioning is an F-Gas certified air conditioning installer based in Exeter, covering homeowners across the South West of England. Every installation is carried out by qualified engineers who handle placement, refrigerant work, and electrical connection to the required standards, so your warranty stays intact and your system performs from day one. Same-day installs are available for qualifying properties, and 0% finance options mean you do not need to delay getting comfortable at home. Visit the domestic installation page to find out more or request a quote directly. If you are still weighing up your options, the choosing the right unit guide is a good place to start.
FAQ
How high should an indoor aircon unit be mounted?
The indoor unit should be mounted 2 to 2.5 metres above the floor on an exterior wall. This height supports natural cool air distribution and keeps refrigerant pipe runs as short as possible.
Can I install an aircon unit myself in the UK?
You can carry out preparatory work such as mounting the backplate and drilling the wall hole, but refrigerant handling and mains electrical connection are legally restricted to certified professionals under UK F-Gas and Part P regulations.
How long does a split system aircon installation take?
A standard single-zone split system typically takes one day to install when the site is prepared and all materials are available in advance.
Why is the wall hole drilled at a downward angle?
The downward angle allows condensate water to drain by gravity to the outside. A level or inward-sloping hole causes water to run back into the wall, leading to damp and structural damage over time.
How often should I service my air conditioning unit?
Book a professional service at least once a year and clean the indoor filters every four to six weeks during regular use. Annual servicing covers refrigerant levels, coil cleaning, and electrical checks.