
Installing a wall-mounted air conditioning unit means physically cutting through your wall, fitting a metal sleeve, and making safe electrical connections to achieve reliable climate control. The process follows a defined sequence: site assessment, wall preparation, sleeve fitting, unit mounting, and electrical connection. Skip a step or rush the sequence, and you risk water ingress, structural damage, or a tripped breaker. This guide covers every stage of the wall mounted AC install steps in plain language, so you can work confidently and know exactly when to call in a professional.
What tools and materials do you need for wall-mounted AC installation?
Getting the right kit together before you start saves time and prevents mid-job trips to the hardware shop. A missing tool at the cutting stage is more than inconvenient. It can cause you to rush and make errors that are expensive to fix.
Essential tools:
- Stud finder
- Spirit level
- Drill with masonry and wood bits
- Hole saw or reciprocating saw
- Tape measure and pencil
- Screwdrivers (flathead and Phillips)
- Caulking gun
- Safety goggles and dust mask
Materials you will need:
| Item | Purpose |
|---|---|
| Wall sleeve (supplied with unit) | Structural housing for the AC unit in the wall |
| Mounting bracket | Secures the indoor unit to the wall surface |
| Timber framing timber | Supports the opening and carries the unit's weight |
| Expanding foam and exterior sealant | Fills gaps to prevent air and water ingress |
| Rigid insulation board | Reduces thermal bridging around the sleeve |
| Appropriate fixings and screws | Fastens bracket and sleeve to studs or masonry |
| Electrical cable and conduit | Connects unit to dedicated circuit |
Larger units running at 230V will need heavier gauge cable and a dedicated circuit breaker. Check the unit's specification sheet before buying electrical supplies.
Pro Tip: Check with your local authority or building control office before purchasing materials. Some installations in England require notification under Part P of the Building Regulations, particularly when new electrical circuits are involved.
How do you select the best location and prepare your wall for installation?
Location choice is the single decision that affects every other stage of the install wall AC unit process. A poor location creates drainage problems, weak structural support, or inadequate airflow, and none of those are easy to fix once the wall is cut.
Choosing the right wall
Select an exterior wall with clear access on both sides. The unit needs at least 20cm of clearance above and below for airflow, and the exterior face should be free from obstructions such as guttering, gas pipes, or windows. Avoid walls that back onto bathrooms or kitchens where plumbing runs close to the surface.
The wall must be structurally sound. Cavity walls are common in UK homes and can support a wall-mounted unit, but you need to confirm the inner leaf is solid enough to carry the sleeve and unit weight. If you are unsure, a builder can check this quickly.
Locating studs and hidden services
Use a stud finder to map the timber or metal framing inside the wall before you mark anything. A thorough site survey identifying studs, wiring, and plumbing beforehand accounts for the majority of successful, leak-free installations. That figure reflects how many installations fail simply because the homeowner skipped this step.
Before marking your cut-out, confirm the following:
- No electrical cables run through the intended cut zone
- No water or gas pipes are present in the wall cavity
- The chosen studs can carry the bracket load
- The exterior face is accessible for sealing and finishing
Marking the opening
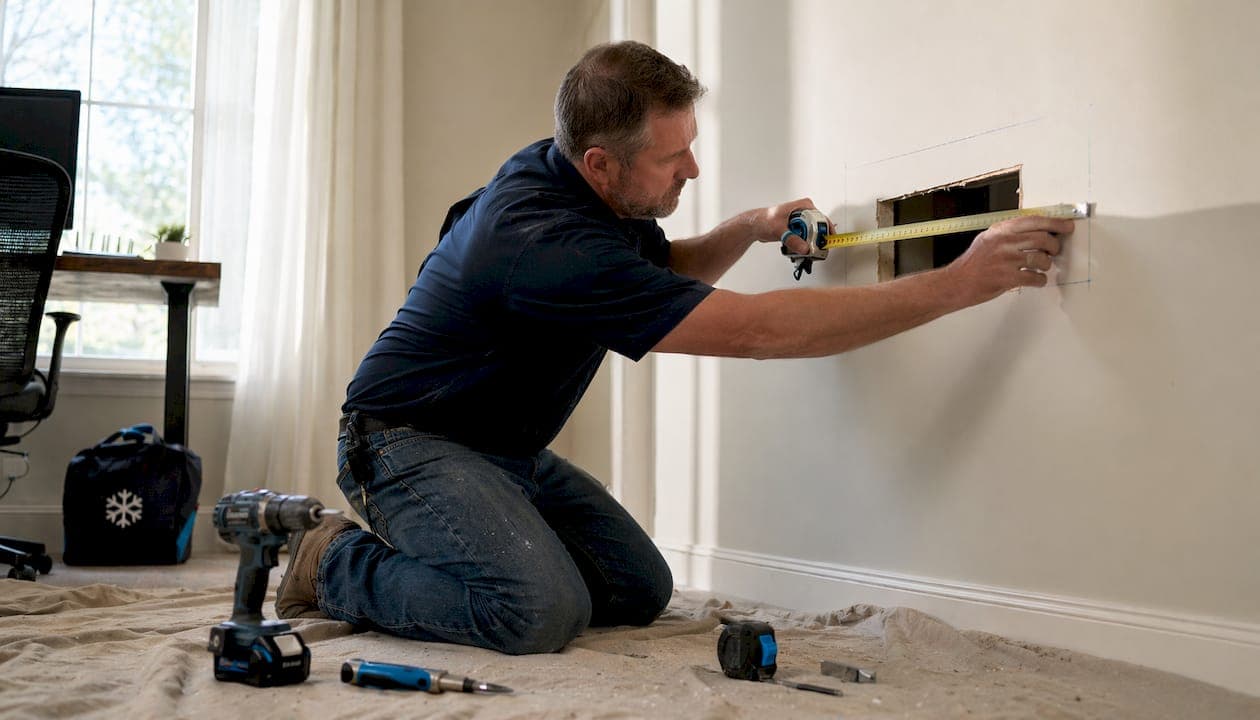
Use the manufacturer's sleeve template to mark the cut-out on the interior wall. Standard rough openings for through-the-wall units measure approximately 26 by 42 inches, but always verify against your specific model's template. Cutting too large weakens the surrounding structure. Cutting too small means the sleeve will not fit.
Pro Tip: Mark the cut-out with masking tape rather than pencil alone. Tape gives you a clear visual boundary and reduces the risk of overrunning the line with a saw.
What are the step-by-step instructions to mount and install the unit safely?
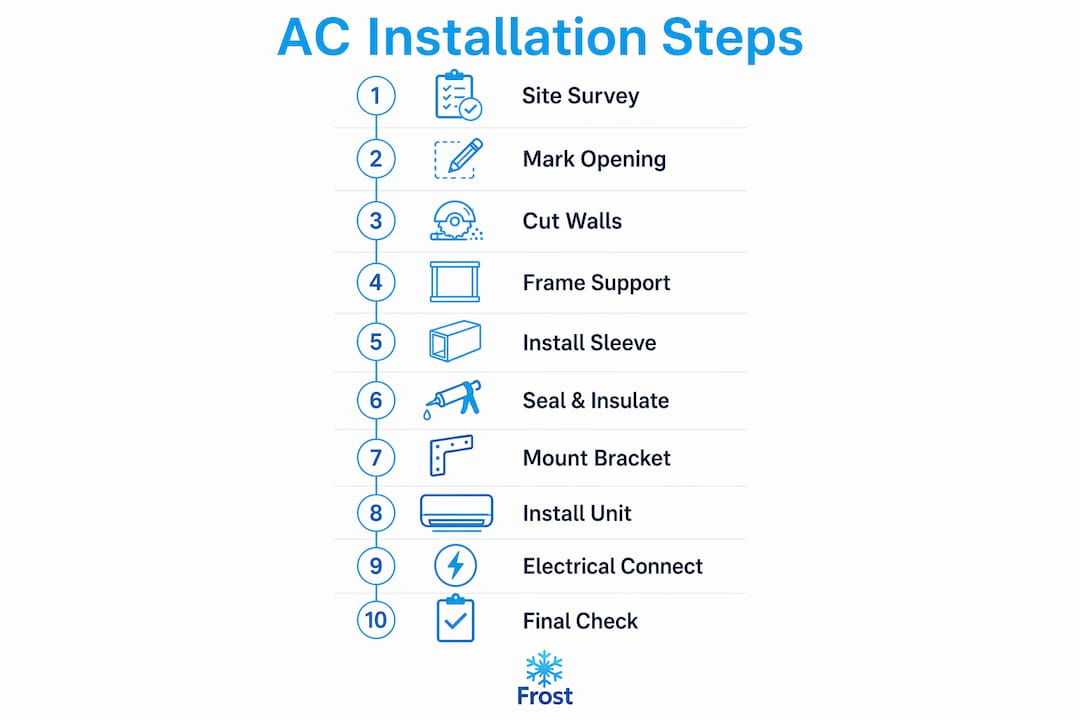
This is the core of the air conditioner installation steps process. Work through each stage in order. Precise sequencing and proper sealing prevent energy loss, water damage, and structural problems. Rushing or skipping steps creates faults that only appear weeks later.
Step 1: Cut the interior wall
Score along your marked lines with a utility knife first to reduce tearing. Then cut through the drywall or plasterboard with a reciprocating saw. Work slowly and keep the blade perpendicular to the wall surface.
Step 2: Cut the exterior wall
From inside, drill pilot holes at each corner of the marked opening. Go outside and connect the pilot holes with your saw. For brick or blockwork, use a masonry blade. Wear goggles and a dust mask throughout.
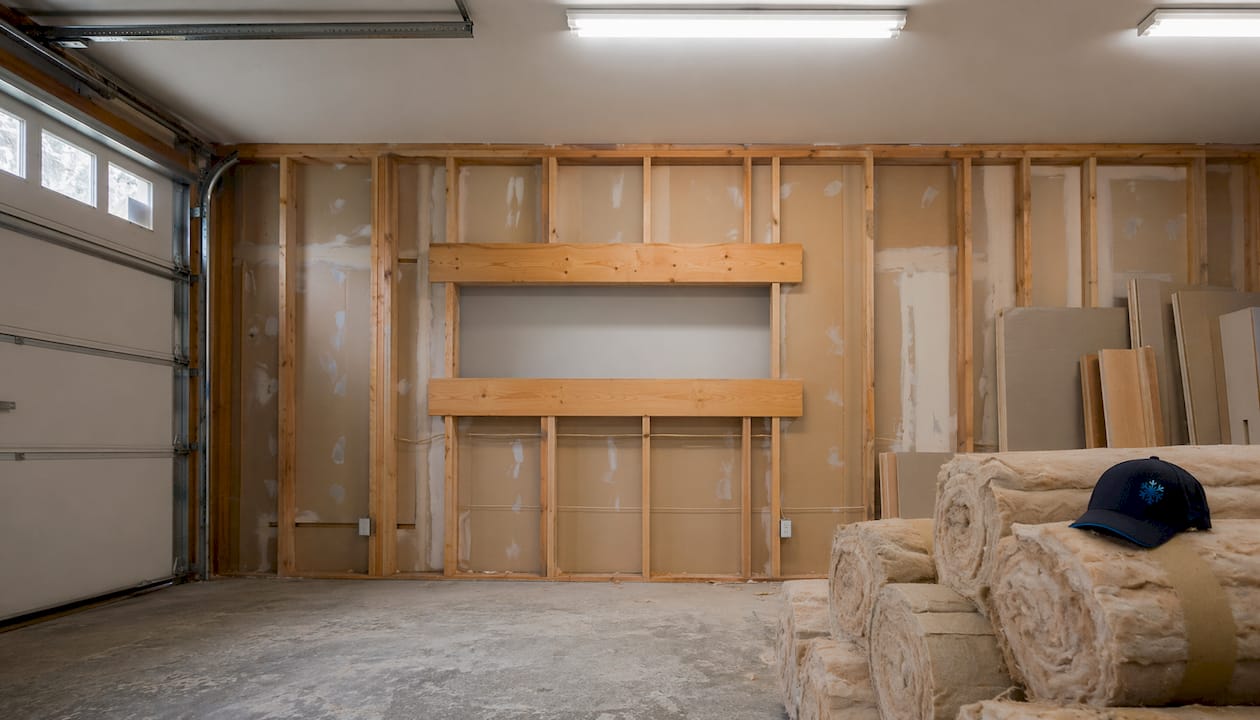
Step 3: Build support framing
Fit timber noggins above and below the opening to carry the sleeve load. The framing transfers weight to the existing studs on either side. Without this framing, the sleeve sits unsupported and the wall around it will crack over time.
Step 4: Install and level the sleeve
Slide the metal wall sleeve into the opening. Place a spirit level on top and adjust until the sleeve is level side to side. Then introduce a slight downward tilt toward the exterior.
- Tilt the sleeve 1/4 inch downward toward the outside to prevent internal water pooling, which causes mould, rust, and wall decay.
- Fix the sleeve to the framing with the screws specified by the manufacturer.
- Check the level again after fixing, as tightening screws can shift the position.
This drainage slope is not optional. A level sleeve traps condensation inside the unit and behind the wall.
Step 5: Seal and insulate
Pack rigid insulation board around the sleeve inside the cavity. Apply expanding foam to fill any remaining gaps. Once cured, trim the foam flush and apply exterior sealant around the outside perimeter of the sleeve. This step determines whether your installation stays dry for years or starts leaking within months.
Step 6: Mount the indoor bracket
Fix the wall bracket to the studs using the pre-drilled holes and the fixings supplied. Failing to drill into wall studs or using inappropriate anchors can cause mounted units weighing 20–30 lbs to sag or pull away, damaging walls and refrigerant piping. Use a stud finder to confirm stud positions before drilling.
Step 7: Slide in the AC unit
With the bracket secure and the sleeve sealed, slide the AC unit into the sleeve from inside. Follow the manufacturer's instructions for locking tabs or fastening screws. The unit should sit flush against the interior wall panel.
Pro Tip: Double-check the drainage slope after the unit is fitted. Place a spirit level on the exterior grille. If it reads level or tilts inward, remove the unit and adjust the sleeve before proceeding.
How should electrical connections be handled to ensure safety and compliance?
Electrical work is where DIY wall AC installation tips end and professional involvement begins for many homeowners. Getting this stage wrong is not just inconvenient. It is a fire risk and, in many cases, illegal without the correct qualifications.
Understanding voltage and circuit requirements
Check the unit's rating plate before touching any wiring. Smaller units (typically under 1.5kW) may run from a standard 13A socket. Larger units are a different matter entirely.
Many larger AC units require a dedicated 230V circuit; connecting them to standard home outlets risks breaker trips and fire hazards. In the UK, installing a new dedicated circuit falls under Part P of the Building Regulations and must be carried out or certified by a registered electrician.
What homeowners can and cannot do
You can typically manage:
- Running conduit from the unit location to the consumer unit
- Installing a fused spur for smaller units on existing circuits
- Connecting plug-in units to existing sockets where the rating allows
A registered electrician must handle:
- Installing new dedicated circuits at 230V
- Connecting to the consumer unit
- Issuing a Part P certificate for notifiable work
- Installing a local isolation switch where required by the manufacturer
DIY savings on mini-split installations can reach £1,500 to £3,000 in labour costs, but electrical final connections remain restricted to licensed professionals. The saving is real, but only when you respect the legal boundary.
Pro Tip: Always ask your electrician to test the circuit capacity before the unit is connected. An overloaded circuit that trips repeatedly will void most manufacturer warranties.
What finishing tasks and common troubleshooting should homeowners expect?
Once the unit is fitted and wired, the installation is not complete. The finishing stage determines whether your setup performs well long term or causes problems within the first season.
Final checks before switching on
- Confirm all exterior gaps are sealed with UV-resistant sealant
- Check that the drainage tilt is correct by running the unit briefly and watching for condensate draining outside
- Verify the unit is flush against the interior wall panel with no gaps
- Test the remote control and all operating modes
Common problems and how to spot them
Water dripping inside: The sleeve tilt is insufficient or the unit is not seated correctly. Switch off and recheck the drainage slope.
Vibration or rattling noise: The unit is not fully locked into the sleeve, or the bracket screws have loosened. Tighten all fixings and check the locking tabs.
Weak airflow: The interior filter is blocked or the unit is not drawing air correctly due to a poor seal around the sleeve. Remove the front panel and check the filter.
Breaker tripping: The circuit is undersized for the unit's draw. Do not reset and retry. Call a registered electrician.
Maintenance and warranty notes
Clean the filter every four to six weeks during heavy use. Check the exterior sealant each autumn before cold weather arrives. Cracks in the sealant allow water into the wall cavity, which causes damage that is far more expensive than a tube of sealant.
Improper installation voids most manufacturer warranties. Keep a record of your installation steps, photographs of the sleeve fitting, and any electrical certificates. If you need ongoing servicing after installation, a qualified engineer can inspect the unit annually and catch problems before they become costly.
Pro Tip: Take photographs at every stage of the installation, particularly the sleeve position, framing, and electrical connections. These images are invaluable if a warranty claim arises later.
Key takeaways
Successful wall-mounted AC installation depends on precise site preparation, correct sleeve drainage slope, and legally compliant electrical connections, in that order.
| Point | Details |
|---|---|
| Site survey first | Identify studs, wiring, and plumbing before cutting to avoid structural and water damage. |
| Drainage slope is non-negotiable | Tilt the sleeve 1/4 inch toward the exterior to prevent mould and wall decay. |
| Stud fixing is critical | Always drill into studs or use rated anchors to support the unit's full weight safely. |
| Electrical work needs a professional | Dedicated 230V circuits require a registered electrician and a Part P certificate in the UK. |
| Document everything | Photographs and certificates protect your warranty and support future servicing. |
What I have learned from watching homeowners tackle this job
The installations that go wrong almost always fail at the same two points: the drainage slope and the electrical stage. Homeowners spend hours on the cut and the framing, get it right, and then rush the sleeve levelling because they are tired and want to see the unit running. A sleeve that sits perfectly level looks fine on day one. By the end of the first summer, there is rust inside the unit and damp behind the plasterboard.
The electrical stage is where I see the other common error. Homeowners read that they can save money by doing the wiring themselves, and they are right that some of it is within reach. But connecting a new 230V circuit to the consumer unit without a Part P certificate is not just a warranty issue. It is a legal one. The certificate matters if you ever sell the property.
What I genuinely respect about homeowners who take this on carefully is the preparation they put in. The ones who read the manufacturer template twice, use a stud finder properly, and call an electrician for the final connection get results that last. The ones who skip the site survey and guess at the stud positions are the ones calling for help six months later.
If you are considering a DIY air conditioner setup, go in with a clear plan, the right tools, and a realistic sense of where your skills end. That boundary is different for everyone, and knowing it is not a weakness. It is what separates a successful install from an expensive repair.
— James
Frostairconditioning: professional support for your installation

Frostairconditioning is an F-Gas certified air conditioning installer based in Exeter, covering the South West of the UK. For homeowners who want the physical mounting handled by a qualified engineer, or who need the electrical stage completed to Part P standard, Frostairconditioning offers domestic installation services with same-day availability and 0% finance options. Every installation is carried out to manufacturer specification, protecting your warranty from day one. If you would prefer a professional to assess your property and provide a fixed price, you can request a quote directly from the website.
FAQ
What is the correct drainage slope for a wall AC sleeve?
Tilt the sleeve 1/4 inch downward toward the exterior. This prevents condensation pooling inside the unit, which causes mould and structural damage.
Do I need an electrician to install a wall-mounted AC unit?
Smaller plug-in units may not require one, but any unit needing a dedicated 230V circuit must be connected by a registered electrician under Part P of the Building Regulations in England.
How do I know if my wall can support a wall-mounted AC unit?
Use a stud finder to locate framing, then confirm the inner leaf of the wall is solid. Units typically weigh 20–30 lbs, so the bracket must fix directly into studs or masonry with rated anchors.
What is the standard rough opening size for a through-the-wall AC unit?
The standard rough opening is approximately 26 by 42 inches, but always verify against the manufacturer's sleeve template before cutting.
Will DIY installation void my AC unit's warranty?
Improper installation, particularly incorrect electrical connections or inadequate structural support, voids most manufacturer warranties. Keep photographic records and obtain any required electrical certificates to protect your cover.