
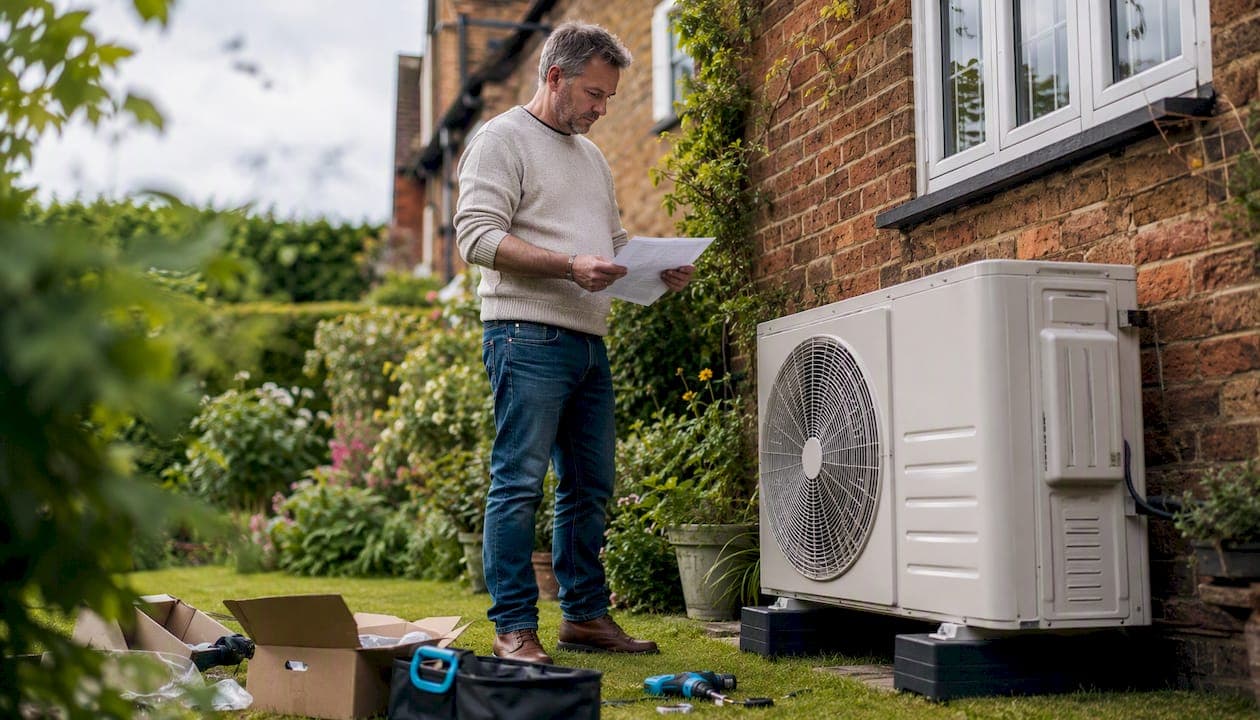
Every AC replacement in the UK must be carried out by a certified professional. That is not a preference; it is a legal requirement the moment refrigerant is involved. Before you contact a single installer, here is what you need to know.
The non-negotiables before any work begins:
- The installer must hold F-Gas/REFCOM certification to handle and recover refrigerant legally.
- A written Manual J-style load calculation must be included in the quote, not offered verbally after you sign.
- The finished job must produce a commissioning report showing vacuum micron readings, superheat/subcooling figures, and measured airflow.
- The quote must state who is responsible for permits and inspections.
- Equipment must carry an AHRI-matched certificate confirming the indoor and outdoor units are rated together.
On timing, a straightforward swap typically takes a few days. A job requiring electrical upgrades or new ductwork can take longer. On cost, base-level installations in the UK start from about £1,500 for a single-room mini-split; a full central system replacement with electrical work can be substantially more expensive. If your unit is old or requires frequent repairs, replacement is often the recommended option.
Table of Contents
- How your AC system works and why it matters for replacement
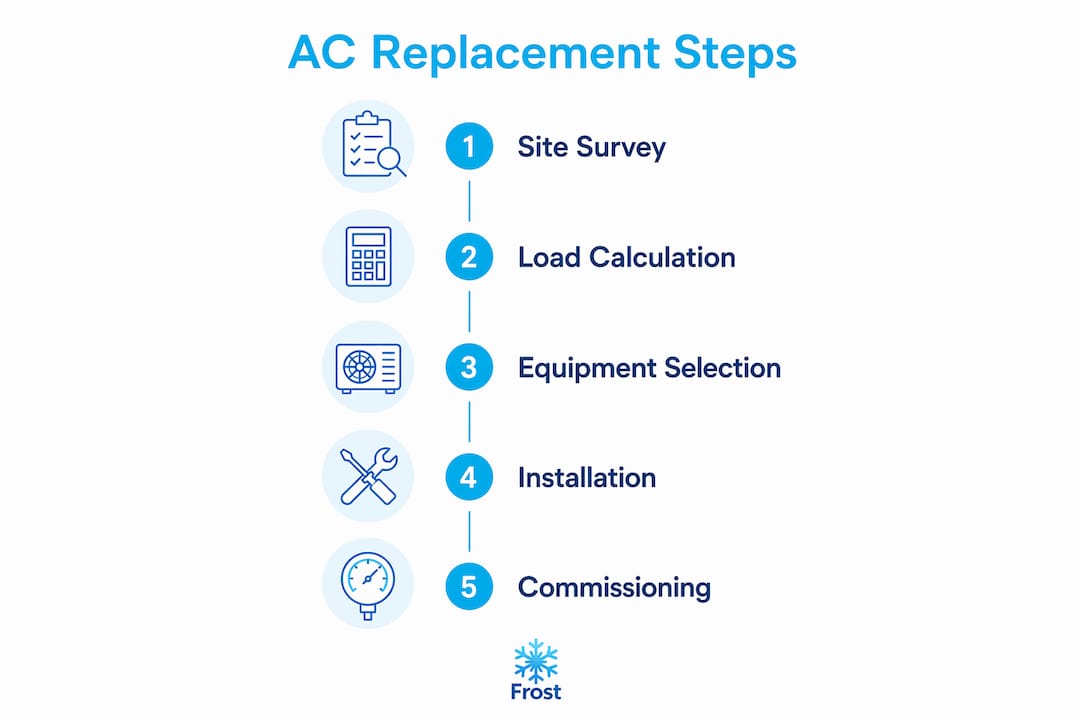
- What a site survey and written quote must cover
- How to choose the right replacement system for your home
- The step-by-step AC replacement process your installer should follow
- How long does replacement take and what does it cost in the UK?
- Permissions, regulations, and certifications you must check
- Can you replace an AC unit yourself?
- Aftercare, warranty registration, and a simple maintenance plan
- What to expect on installation day
- Why installation quality matters more than the brand you choose
- Key takeaways
- What installers keep getting wrong, and how to avoid it
- Frostairconditioning: certified replacements across Exeter and the South West
- Useful sources
How your AC system works and why it matters for replacement
Understanding the four core components helps you follow what your installer is doing and ask the right questions.
- Outdoor condenser/compressor: Releases heat extracted from inside the home. The compressor is the most expensive single component.
- Indoor evaporator coil/air handler: Absorbs heat from indoor air as refrigerant evaporates through the coil.
- Matched refrigerant circuit: The indoor coil and outdoor unit must be AHRI-matched to achieve the rated efficiency. Mismatched pairs short-cycle, dehumidify poorly, and void the manufacturer warranty.
- Ductwork or refrigerant line-set: Carries conditioned air or refrigerant between the two units; its condition directly affects whether a like-for-like swap is viable.
Poor matching is one of the most common causes of a new system underperforming from day one. An oversized unit cools too quickly, never runs long enough to pull humidity out of the air, and cycles on and off in a way that stresses the compressor. An undersized one simply cannot keep up on a warm Devon afternoon.
What a site survey and written quote must cover
A quote given over the phone without a site visit is a red flag. A proper survey covers the following:
- Access routes for indoor and outdoor units
- Ductwork condition (leaks, sizing, insulation)
- Electrical panel capacity and existing circuit breakers
- Condition of the existing line-set and whether it can be reused
- Evaporator coil condition
- Loft insulation levels and window orientation for load estimation
A like-for-like quote based only on the old unit's size should be treated with scepticism. Insulation levels, window glazing, and room layouts change over time; the original sizing may well have been wrong in the first place.
What a good written quote must include:
- Written Manual J-style load calculation output
- AHRI-matched equipment certificate
- Line-set strategy (reuse, flush, or replace)
- Who pulls the permit and arranges the inspection
- A commissioning checklist confirming what will be measured and recorded at sign-off
Pro Tip: Always get at least two written quotes and compare scope, not just price. A quote that is £400 cheaper but omits the load calculation and commissioning report will almost certainly cost more to put right later. Ask each installer directly: "Will you provide the Manual J output in writing before I sign?"
For more on what to look for when vetting installers, the guide on choosing an AC installer covers the key questions and red flags in detail.

How to choose the right replacement system for your home
The system type, refrigerant, and efficiency rating all need to match your home's actual requirements, not a generic rule of thumb.
System types:
- Single-room mini-split (ductless): The most common choice for UK homes adding cooling for the first time. Low disruption, no ductwork needed, and heat-pump variants provide winter heating too.
- Multi-split: One outdoor unit serving multiple indoor heads. Good for homes wanting whole-house coverage without ductwork.
- Ducted central system: Suits larger properties already fitted with ductwork. Higher install cost but invisible once fitted.
- Heat pump (air source): Provides both heating and cooling; particularly relevant in the South West where mild winters make the efficiency case compelling year-round.
Efficiency and SEER2:
The SEER2 test procedure changed in 2023 and typically produces ratings roughly 5% lower than the old SEER scale, so do not compare old and new ratings directly. Higher SEER2 means lower running costs, but the payback depends on how many hours per year the system actually runs. In a warmer region like Devon or Cornwall, the case for a higher-efficiency unit is stronger than in, say, northern Scotland.
Refrigerant transition:
R-410A is being phased out across Europe. Modern systems use R-32 or R-454B, both classified as A2L (mildly flammable). Installers working with A2L refrigerants need specific training and leak-detection equipment. If your existing line-set carried R-410A, it cannot simply be reused with a new R-32 system without a certified flush or full replacement, because contaminated oil residue can destroy a new compressor.
Sizing:
Never accept a size recommendation based on square footage alone. The Manual J load calculation accounts for ceiling height, insulation, window area and orientation, occupancy, and local climate data. It is the only defensible basis for choosing tonnage. For further guidance on matching system type to your home, see how to choose an air conditioner.
The step-by-step AC replacement process your installer should follow
This is the sequence a competent, certified installer will work through. Knowing it helps you spot shortcuts.
- Site protection and system shutdown. The installer isolates power at the consumer unit and the outdoor disconnect before touching any equipment.
- Refrigerant recovery. A recovery machine pulls all remaining refrigerant from the existing circuit into a certified recovery cylinder. Venting refrigerant to atmosphere is illegal under UK F-Gas regulations. This step typically takes some time to complete properly.
- Remove old indoor unit. Line-set connections are cut or unbraised; electrical wiring is labelled and pulled from the air handler cabinet.
- Remove old outdoor unit. The condenser is disconnected and removed; the pad or mounting bracket is assessed for reuse.
- Assess the line-set. The installer checks whether the existing copper pipework can be reused with the new refrigerant type. If the system is switching refrigerant families, a certified flush or new line-set is required.
- Install indoor unit and condensate drain. Alignment and mounting must be precise; a poorly mounted air handler causes condensate to back up, damaging the coil and the ceiling below.
- Set outdoor condenser on pad. Correct placement ensures adequate airflow around the unit and meets manufacturer clearance requirements.
- Run and insulate the line-set. New or flushed copper pipework is brazed or flared, then insulated along its full length to prevent condensation and heat gain.
- Electrical connections. High-voltage supply to the outdoor disconnect and air handler circuit; low-voltage control wiring between the air handler, thermostat, and outdoor unit. A digital multimeter verifies voltage and checks for wiring faults before power-on.
- Vacuum to ≤500 microns. The installer connects a vacuum pump to the service ports and evacuates the system thoroughly for an appropriate duration. Once the target is reached, the pump is isolated and the installer monitors the system to ensure it holds vacuum without rising pressure. A rising reading indicates a leak or residual moisture. Skipping this step is one of the most common causes of early compressor failure.
- Charge to manufacturer specification. The factory charge is released from the outdoor unit's service valves; additional refrigerant is added per line-set length if required. Superheat and subcooling measurements at the service ports confirm the charge matches actual operating conditions.
- Airflow and static pressure checks. Measured airflow in CFM per ton is recorded. Static pressure across the air handler confirms ductwork is not restricting performance.
- Leak check. An electronic leak detector is used across all brazed joints and service ports.
- Commissioning report. The installer records vacuum micron readings, superheat/subcooling figures, measured airflow, and any permit or inspection reference numbers. This document is yours to keep.
Safety callouts to be aware of:
- Power must be fully isolated before any disconnection; never allow work to begin with the system live.
- Refrigerant recovery is a legal obligation, not a courtesy. Ask to see the recovery cylinder and the technician's F-Gas certificate. Installers handling newer refrigerants require specific training and leak-detection equipment.
Demand these on sign-off: vacuum micron record, superheat/subcooling readings, measured airflow (CFM/ton), and permit or inspection reference.
How long does replacement take and what does it cost in the UK?
Typical timelines:
- Straightforward like-for-like swap: 1–2 days
- Swap with electrical upgrade or new ductwork: 2–5 days
- Major structural alterations or multi-zone installation: several weeks
| Installation type | Approximate UK cost range | Notes |
|---|---|---|
| Single-room mini-split (base) | £1,500 | Like-for-like, existing line-set reused |
| Single-room mini-split (mid-tier) | — | New line-set, higher SEER2 unit |
| Multi-split (2–3 rooms) | — | Includes new pipework and commissioning |
| Full ducted central system | — | Electrical upgrade and ductwork often required |
| Common adders | — | New line-set, electrical panel upgrade, A2L handling, permits |
Factors that move the price:
- Access difficulties (loft, confined plant room, listed building constraints)
- Need for a new line-set rather than reuse
- Electrical panel upgrade to accommodate the new system's draw
- Choice of efficiency tier (higher SEER2 units carry a premium)
- Local labour rates (South West rates differ from London)
- Whether rebates or 0% finance are available through the installer
For a fuller picture of what drives upgrade costs, the guide on upgrading old aircon breaks down the decision factors in detail.
Permissions, regulations, and certifications you must check
F-Gas/REFCOM:
Any work involving refrigerant handling or recovery in the UK requires the technician to hold a valid F-Gas certificate issued under the UK F-Gas Regulation. REFCOM is the UK's primary registration scheme for F-Gas certified companies. Ask to see the certificate number before work begins; you can verify it on the REFCOM register. A company that cannot produce this should not be touching your system.
Electrical competence:
Connecting a new AC system to the consumer unit or upgrading a circuit is notifiable work under Part P of the Building Regulations in England. The installer must either be registered with a competent person scheme (such as NICEIC or NAPIT) or the work must be inspected and certified by your local building control authority. Always ask for the electrical installation certificate.
Waste and recycling:
Old AC equipment falls under the Waste Electrical and Electronic Equipment (WEEE) Directive. The installer is responsible for disposing of the old unit through an approved WEEE collection point. Recovered refrigerant must be documented; ask for the recovery record as part of your handover pack.
Permits and inspections:
Permits are not optional paperwork; they trigger a third-party safety inspection that protects you when you sell the property or make an insurance claim. Confirm in writing that the installer will pull the relevant permit and provide the inspection reference number. Local authority requirements vary, so a good installer will know what applies in your area. Understanding why local installer knowledge matters for navigating these local rules is one reason choosing a regional specialist pays off.
Can you replace an AC unit yourself?
No. And not just because it is technically difficult.
Legal risks:
Handling, recovering, or releasing refrigerant without an F-Gas certificate is a criminal offence under UK law. There is no grey area here. Even if you source the equipment yourself, no certified installer will charge a system you have partially assembled without taking liability for the whole job.
Safety risks:
AC systems operate at high voltages. The outdoor unit capacitor retains a lethal charge even after power is isolated. Incorrect vacuum or charge causes compressor failure, often within the first season. Brazed refrigerant joints done incorrectly leak slowly and are difficult to detect without specialist equipment.
Warranty and insurance risks:
Virtually every manufacturer warranty requires installation by a certified professional. An unpermitted installation can also cause a home insurance claim to be refused, and it will surface as a problem when you sell the property. The risks of DIY installation extend well beyond the install day itself.
What you can safely do yourself:
- Clear the work area and ensure access to the loft, consumer unit, and outdoor space.
- Photograph the existing equipment (model numbers, pipe routes, electrical connections).
- Gather all existing paperwork (old commissioning reports, warranty documents).
- Ask for all paperwork before the crew leaves.
Pro Tip: Take photos of the existing system before the installer arrives. Model numbers, refrigerant type, line-set routing, and electrical connections are all useful reference points if there is ever a dispute about what was replaced or changed.
Aftercare, warranty registration, and a simple maintenance plan
Your handover pack should contain:
- Commissioning report (vacuum micron reading, superheat/subcooling figures, measured airflow)
- Equipment model and serial numbers for both indoor and outdoor units
- Permit and inspection reference numbers
- Warranty documents and registration instructions
- Contact details for post-install support
Warranty registration:
Most manufacturers require registration within 30–90 days of installation to activate the full warranty period. A reputable installer will handle this as part of the job or at minimum provide the registration link and serial numbers. Do not assume it has been done; check.
Simple maintenance schedule:
- Monthly: Check and clean or replace the air filter. A blocked filter is the single most common cause of reduced efficiency and frozen coils.
- Seasonally: Clear debris from around the outdoor unit; maintain at least 300mm clearance on all sides.
- Annually: Book a professional service that includes coil cleaning, refrigerant pressure check, electrical connection inspection, and condensate drain flush.
For a full breakdown of what to request at an annual service, the commissioning and quality guide covers the key tests in detail. You can also find practical day-to-day tips in the homeowner AC use guide.
A service maintenance plan through your installer is the simplest way to keep the warranty valid and catch problems before they become expensive.
What to expect on installation day
A little preparation on your side makes the crew's job faster and the handover cleaner.
Before the crew arrives:
- Clear a 1-metre working area around the indoor unit location and the outdoor unit position.
- Ensure access to the loft or plant room, consumer unit, and any rooms where pipework will run.
- Arrange parking close to the property for the installer's van and equipment.
- Keep pets and children away from the work area throughout the day.
- Have someone present for the full duration; you will need to sign off the commissioning checklist at the end.
During the job:
Expect noise during the removal phase (cutting, drilling for line-set penetrations) and again during the vacuum and commissioning phase. The noisiest tasks typically last 1–2 hours. The vacuum hold test is quiet but takes 30–60 minutes; do not ask the installer to rush it.
Before the crew leaves, check you have:
- Signed commissioning checklist with all readings recorded
- Permit number or confirmation that the permit application has been submitted
- Warranty registration instructions and serial numbers
- A contact name and number for post-install support
Note: modern systems include a compressor restart delay of around three minutes to protect the motor from high discharge pressure after shutdown. If the system does not cool immediately after first power-on, wait three minutes before assuming a fault.
Why installation quality matters more than the brand you choose
The research is consistent on this point: installation quality is often the single biggest determinant of long-term performance. A premium system installed with a skipped vacuum, a mismatched coil, or an incorrect charge will underperform a mid-range system installed correctly from day one.
Common installation errors and their consequences:
- Wrong refrigerant charge: Overcharging raises head pressure and shortens compressor life; undercharging reduces capacity and causes the evaporator to ice over.
- Skipped or rushed vacuum: Residual moisture in the line-set reacts with refrigerant oil to form acids that corrode the compressor from the inside.
- Mismatched indoor/outdoor coils: Reduces the system's rated efficiency and voids the AHRI certificate, which in turn voids the manufacturer warranty.
- Reused line-set without a certified flush: Oil residue from R-410A is incompatible with R-32 and R-454B lubricants; contamination destroys the new compressor.
A correctly executed installation with documented commissioning delivers measured efficiency close to the nameplate SEER2 rating. Cutting corners on the vacuum, the charge, or the coil match is where the gap between what a system is rated to do and what it actually does comes from. Homeowners who insist on written commissioning records are not being difficult; they are protecting a significant investment.
Frostairconditioning's engineers are F-Gas/REFCOM certified, carry out same-day and next-day installations across Exeter and the South West, and offer 0% finance on qualifying systems from Samsung, Mitsubishi, Toshiba, and Daikin. Every installation includes a written commissioning report.
Key takeaways
A professional, permitted AC replacement with a written Manual J load calculation and documented commissioning is the only route that protects your warranty, your insurance, and your investment.
| Point | Details |
|---|---|
| Insist on F-Gas/REFCOM certification | Verify the installer's certificate number on the REFCOM register before any work begins. |
| Require a written load calculation | A Manual J-style calculation in the quote is non-negotiable; reject verbal sizing. |
| Demand commissioning records | The handover pack must include vacuum micron readings, superheat/subcooling figures, and measured airflow. |
| Register your warranty promptly | Most manufacturers require registration within 30–90 days; confirm the installer has done it or do it yourself. |
| Frostairconditioning for South West homeowners | F-Gas certified, same-day installs available, 0% finance on qualifying systems across Exeter and the South West. |
What installers keep getting wrong, and how to avoid it
The pattern that comes up repeatedly in AC replacements is not a failure of equipment; it is a failure of process. Oversizing is the most common single error. An installer who recommends a larger unit "just to be safe" is not being cautious; they are skipping the load calculation and guessing. An oversized system short-cycles, fails to dehumidify properly, and wears out faster than a correctly sized one.
The second recurring issue is reused line-sets on refrigerant transitions. With the shift away from R-410A now well underway, a significant proportion of replacements involve a refrigerant change. Flushing the old pipework is not always sufficient; in many cases a new line-set is the only safe option, and installers who skip this to save time are setting up a compressor failure within a year or two.
The third is the skipped vacuum. Thirty minutes on a vacuum pump feels like dead time on a busy install day. Skipping it or cutting it short is the single most reliable way to destroy a new compressor within two to three seasons. A commissioning report with a micron reading is the only proof it was done properly.
The practical takeaway: prioritise the installer's process over the brand name on the box. A mid-range Daikin or Mitsubishi installed correctly will outperform a premium unit installed carelessly. Ask every installer for their commissioning checklist before you sign anything. If they cannot produce one, find someone who can.
Frostairconditioning: certified replacements across Exeter and the South West
Replacing an AC unit is a significant investment, and the difference between a job done right and one that fails within two seasons almost always comes down to the installer, not the equipment.
Frostairconditioning carries out domestic AC installations across Exeter, Devon, Cornwall, and the wider South West, with F-Gas/REFCOM certified engineers on every job. Same-day and next-day installations are available, and 0% finance is offered on qualifying systems, so the upfront cost does not have to be a barrier.

Every installation includes a written Manual J-style load calculation, full commissioning documentation (vacuum micron readings, superheat/subcooling, measured airflow), permit handling, and warranty registration. You get the paperwork you need to protect your investment from day one.
To request a written quote or book a site survey, visit the quote page or call the team directly. The site survey is the starting point; everything else follows from getting the sizing right.
Useful sources
- REFCOM F-Gas register — verify your installer's F-Gas certification before work begins.
- UK F-Gas Regulation guidance (GOV.UK) — official guidance on refrigerant handling obligations.
- Part P Building Regulations (Planning Portal) — confirms when electrical work requires notification or a competent person certificate.
- WEEE regulations guidance (GOV.UK) — covers correct disposal of old AC equipment.
- AC Units Guide: installation and commissioning — technical detail on commissioning standards and Manual J guidance.
- ElectrifyCost: AC replacement guide — covers vacuum procedure, refrigerant transitions, SEER2 changes, and permit requirements.
- Frostairconditioning domestic installation — service page for homeowners in the South West seeking a certified replacement quote.
- Frostairconditioning service and maintenance — annual maintenance plans to protect performance and warranty after installation.