
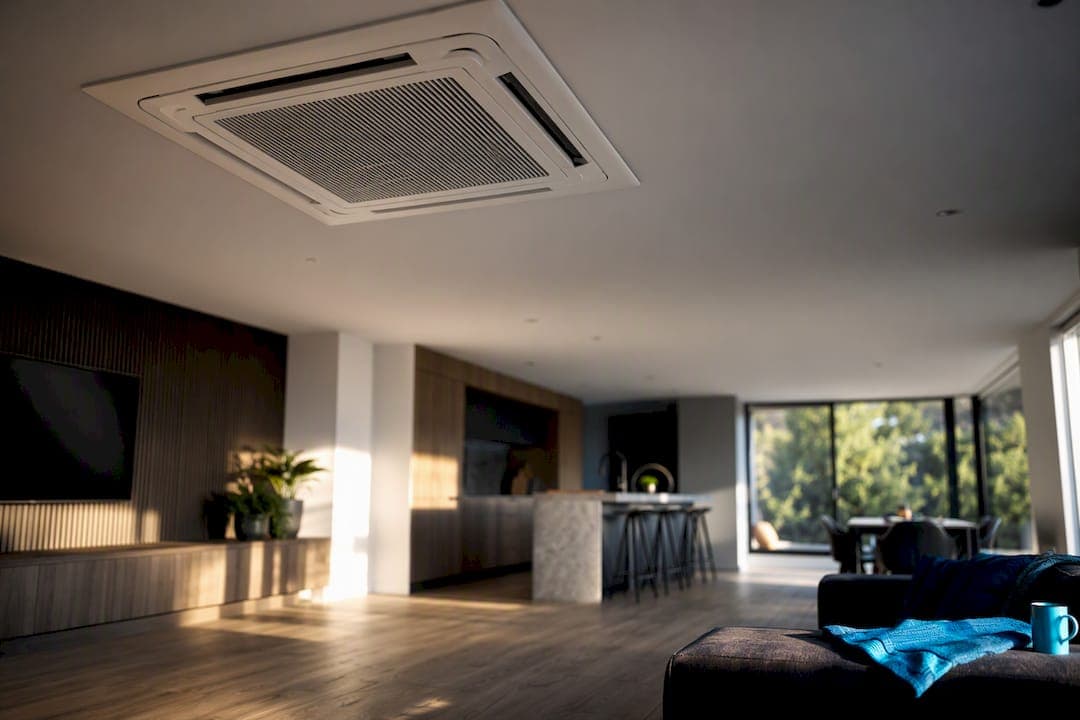
Put a four-way ceiling cassette at or near the room's geometric centre so its four-way outlets distribute air evenly across the space. That's the manufacturer default and the right call for most rooms. Structural obstacles, ceiling plenum depth, or drainage routes can force a different spot, but any deviation from centre needs a specific engineering reason, not convenience.
TL;DR:
- Proper placement of a four-way ceiling cassette should be at the room’s center unless structural obstacles or room zoning demand otherwise, to ensure even airflow and efficiency.
- Ceiling height and plenum depth are critical; standard installations suit ceilings up to 3.8 meters, but higher ceilings require special connectors or alternative units.
- Drainage must slope downward to avoid condensate problems, and insulation is essential when humidity exceeds 80% to prevent leaks and ceiling stains.
- Structural support must be robust, using M8 bolts or anchors, with reinforcement for weak ceilings, to prevent sagging or vibrations over the unit’s lifespan.
- Obstructions such as beams, light fittings, or furniture can block airflow, so careful room survey, including smoke tests, is vital to ensure unobstructed four-way throw patterns.
Table of Contents
- What determines the best ceiling cassette placement?
- How much ceiling height and clearance do I need?
- How do you prevent condensation and drainage problems?
- What structural support does a ceiling cassette need?
- Does my ceiling have enough space for a cassette?
- What obstructions ruin ceiling cassette airflow?
- What access and maintenance space does the unit need?
- What should be on your installer checklist?
- What Frost Air Conditioning tells homeowners on site
- Why installation guides oversimplify placement
- Book a survey with Frost Air Conditioning
- Manufacturer manuals worth keeping on file
- Sources
- FAQ
What determines the best ceiling cassette placement?
Four-way cassettes throw air in four directions simultaneously, which is why manufacturers consistently point installers towards the room's centre. Daikin's own installation guidance recommends central mounting specifically to exploit that even spread and avoid corner or wall-adjacent mounting unless the unit is a corner-specific design. Push a standard four-way unit into a corner and you lose two of its four throw directions to the walls, leaving the far side of the room under-served no matter how powerful the compressor is.
Central placement does more than even out the temperature readout on a wall controller. In open-plan rooms it genuinely improves how uniform the space feels from one side to the other, and it often means one cassette does the job that would otherwise need two smaller units fighting each other's airflow. That's a meaningful saving on both install cost and ongoing running expense.
There are legitimate reasons to move off-centre. A structural beam running through the middle of the ceiling void, an existing light fitting cluster, or a room that's really two zones knocked into one (a kitchen-diner, for instance) can all justify shifting the unit or splitting the load across two units. Corner cassette models exist precisely for rooms where a true centre position isn't achievable, but they trade some throw distance for that flexibility.
Room shape and furnishings matter more than most homeowners expect:
- Long, narrow rooms often perform better with the cassette positioned along the room's long axis rather than dead centre on a square grid, so all four throws have room to develop.
- Tall bookcases, open-plan kitchen islands, or partial partition walls can create dead zones even with perfect central placement, because they physically block one or more airflow directions.
- Installers commonly walk the room with a smoke pen or even a tissue on a stick during survey to check that all four throw paths actually reach the walls unobstructed. It's a five-minute test that catches problems a floor plan alone won't show.
Frost Air Conditioning's own step-by-step placement guide walks through this survey process in more detail, including how room usage patterns (where people actually sit and sleep) factor into the final decision alongside pure geometry.
How much ceiling height and clearance do I need?
Manufacturer manuals set specific numbers here, and they matter more than most fitting guides let on. Daikin's FXKQ-MA installation manual specifies the bottom panel should sit more than 2.5 metres from the floor, with standard installations rated up to 3.8 metres.
Quick reference: Above a certain higher ceiling height, the same manual calls for connector changes and outlet blocking pad adjustments before the unit will perform to spec. That's not a minor footnote. It's the difference between a cassette that cools evenly and one that short-cycles air back into itself near the ceiling.
Practical implications for a UK domestic survey:
- In lower-ceilinged rooms, a ceiling cassette generally isn't the right format. A wall-mounted or ducted alternative usually fits better in low-ceilinged rooms, particularly older terraced housing with original ceiling heights.
- Within typical mid-range ceiling heights, standard installation applies with no special parts required.
- At higher ceiling heights, expect the installer to fit revised connectors and blocking pads, or in genuinely tall spaces, to recommend a different unit entirely.
- At the upper end of typical ceiling heights, some unit ranges reach their limit and a specialist high-level solution or additional units become the more sensible route.
A proper home survey should record the actual floor-to-ceiling measurement at the proposed cassette location (not just a nominal room height quoted from the property listing), plus a note of anything protruding from the ceiling void that might reduce usable clearance further. Frost's guide to high ceiling cooling covers what changes when you're working above that 2.7 metre threshold.
How do you prevent condensation and drainage problems?
Condensate handling is where a lot of ceiling cassette installs go wrong months after the engineer has left, and it's almost always down to slope or insulation, not the unit itself. Gravity fall is the preferred method wherever the drain run allows it: a continuous downward slope carries condensate to an external point with no moving parts to fail. Where the pipe run has to travel horizontally across a large plenum or even rise slightly to clear an obstruction, a condensate pump becomes necessary.
Pumps are also the most common point of failure in the whole system, which is why experienced installers keep a gentle gravity-assisted slope in the drain run even when a pump is fitted, rather than relying on the pump alone to shift standing water. It's a belt-and-braces approach that costs nothing extra at install time, and saves a callout later.
Insulation is not optional in humid ceiling voids. Daikin's manual requires additional thermal insulation on the unit body itself once relative humidity in the ceiling exceeds 80%, specifying materials such as glass wool or polyethylene foam at a minimum of 10mm thickness. Mitsubishi Electric's pipe insulation guidance is equally specific about the pipework: liquid and gas lines need separate, full-length coverage with no gaps at the joints, because a single weak seam is enough to start a drip that shows up as a ceiling stain weeks later.
Before signing off any installation, insist on these commissioning checks:
- The drain is tested with a jug of water poured directly into the pan to confirm it clears fully and doesn't pool.
- Every pipe joint is inspected for insulation gaps, particularly where the pipe passes through a joist or bracket.
- The unit is run on cooling mode for at least fifteen minutes to check for any dripping at the panel edges.
Pro Tip: Ask your installer to photograph the drain route and insulated pipework before the ceiling panels go back up. It costs them nothing and gives you evidence if a problem surfaces later that the install itself, not the unit, is at fault.
For more on avoiding damp patches and staining around vents, Frost's condensation prevention guide goes into the materials and warning signs in more depth.
What structural support does a ceiling cassette need?
A ceiling cassette weighing anywhere from 15 to 25 kilograms, plus the water it holds during operation, needs fixings rated for sustained load, not just the ceiling material itself. Vendor installation sheets specify M8 suspension bolts or suitable anchors as the standard fixing method, with bolt length pre-adjusted before the unit is lifted into place.
- Check the ceiling structure first. Joists, trusses, or a concrete slab all take fixings differently, and the installer needs to confirm what's actually above the plasterboard before drilling anything.
- Fit M8 suspension bolts or approved anchors at each corner, adjusting bolt length so the unit sits level once the panel is offered up. A spirit level check at this stage saves a return visit later.
- Add reinforcement where the existing structure is marginal. If joist spacing is wide or the ceiling shows any give when tested by hand, an edge beam or additional noggin between joists spreads the load properly.
- Use a positioning jig or paper template to mark the exact ceiling opening before cutting. Daikin's manual supplies these templates precisely because a misaligned cut is very difficult to correct once plasterboard is removed.
- Coordinate the cut date with your builder or ceiling trade so the opening is made cleanly and the surrounding finish isn't compromised.
A ceiling that vibrates or sags slightly under the unit's running weight is a sign the original fixing wasn't adequate, and it's worth flagging at commissioning rather than living with a rattling ceiling for years.
Does my ceiling have enough space for a cassette?
Suspended or dropped ceilings are the ideal scenario for cassette installation because the void above the tile grid gives generous room for pipework, wiring, and the unit body itself, with easy access for future servicing. Shallow plasterboard ceilings on standard joists are far more restrictive, and this is where a lot of retrofit projects hit an unexpected snag partway through survey.

Mitsubishi Electric's installation guidance sets a practical threshold: where the gap between the unit and the ceiling or structural members is less than 300mm, you need a dedicated access door or an alternative access arrangement for the electrical box and future maintenance work. Without it, a filter clean or an electrical fault six months down the line means cutting into a finished ceiling all over again.
Options when plenum depth is tight:
- Fit a discreet access panel directly above the electrical connection point, finished to match the ceiling.
- Reposition the unit slightly to align with an existing loft hatch or service void, if the room layout allows it.
- In genuinely shallow ceilings, consider whether a slimline ducted system or wall-mounted unit is the more realistic fit than forcing a cassette into a space it wasn't designed for.
Coordinating with your ceiling installer before any boarding goes up is the single most useful thing a homeowner can do here. Once plasterboard is fixed and skimmed, every one of these options becomes a repair job instead of a planning decision.
What obstructions ruin ceiling cassette airflow?
A cassette can be mounted perfectly to spec and still perform poorly if the throw pattern is blocked. Structural beams, pendant light fittings, and extractor fan housings positioned close to the unit's louvres are the usual culprits, each one cutting off part of the four-way spread before it reaches the room.
Furniture and partition walls matter just as much as fixed obstructions. A tall dresser or an open-plan partial wall can create a dead zone that no amount of unit power fixes, because the air simply never gets there. In larger or awkwardly shaped rooms, the honest answer is sometimes a second, smaller unit rather than trying to force one cassette to cover a floor plan it was never sized for.
- Keep at least a clear throw path in all four directions, free of beams, light fittings, or fan housings within the immediate vicinity of the unit.
- Map furniture placement before final positioning is confirmed, not after the ceiling is cut.
- Watch for existing extractor vents nearby that could short-cycle conditioned air straight back outside.
Pro Tip: A smoke pen (or a thin strip of tissue taped to a rod) held at each corner of the room during commissioning shows instantly whether all four airflow directions are actually reaching the walls, rather than trusting the controller's temperature reading alone.
What access and maintenance space does the unit need?
Every ceiling cassette needs planned access for the life of the system, not just the day it's fitted. Filter panels slide out for regular cleaning and the electrical connection box needs reachable clearance for any future fault-finding.
- Leave clear access beneath the filter panel and electrical box, with a service door positioned directly below or adjacent if the plenum is tight.
- Route refrigerant piping, the condensate line, and control wiring with enough slack and accessible runs that a future repair doesn't mean stripping the whole ceiling back.
- Request a full commissioning handover pack, including a signed commissioning sheet, documented drain test results, and a recommended service schedule for the unit going forward.
Frost's guide to certified installation steps sets out what a proper handover document should contain if you want something concrete to check your own paperwork against.
What should be on your installer checklist?
Before any panel goes back up, run through this list with whoever is fitting the unit:
- Ceiling structure confirmed strong enough for suspension bolts, with reinforcement added if joist spacing is marginal.
- Plenum depth measured and access doors planned wherever the gap falls under 300mm.
- Drain route mapped with gravity slope maintained even if a pump is also fitted.
- Pipe and unit body insulation specified correctly for the ceiling's humidity level.
- Positioning jig used to confirm the ceiling opening aligns exactly with the unit before cutting.
- Commissioning tests scheduled: drain test, cooling run, and electrical safety check.
Questions worth asking your installer directly during survey: How will the drain be routed, and is a pump needed? What insulation material and thickness will be used on the pipework? Does the ceiling need reinforcement before fixing? What's covered under warranty, and is an annual service plan available? At handover, ask for the commissioning sheet and drain test evidence in writing, not just a verbal confirmation that everything's working.
What Frost Air Conditioning tells homeowners on site
Some installers fit domestic and commercial systems with engineers holding relevant certifications and offer premium systems from various manufacturers depending on the property. James, who writes much of Frost's technical guidance, covers placement, outdoor unit siting, and high-ceiling installations across the company's blog, including the outdoor unit placement rules that affect how pipework routes between the indoor cassette and the condensing unit outside.
When obtaining quotes for a cassette installation, it is advisable to ask for proof of relevant certifications before work starts and to request a written commissioning report at handover, not just a verbal confirmation. It's also worth checking whether the site has any flammable gas storage or unusually high humidity nearby. Vendor installation sheets explicitly warn against siting units in either condition, a caution that also applies near commercial kitchen equipment such as gas-fired pizza ovens, where installation compliance requirements follow a similar logic around ventilation and heat sources.
Why installation guides oversimplify placement
Most consumer-facing advice on this topic boils down to "put it in the middle of the room," which is true as far as it goes but skips the part that actually determines whether the install works long-term. The manufacturer manuals are unambiguous about height thresholds, humidity limits, and fixing hardware, yet very little of that detail survives into the average buying guide a homeowner reads before getting quotes.

What gets underrated is drainage. Everyone worries about whether the unit will cool the room, and almost nobody asks about the slope on the condensate line until water starts coming through a ceiling six months later. A pump-only drain system with no gravity assistance is asking for a future callout, and it's a cheap thing to get right at install time versus expensive to fix afterwards.
If there's one thing worth prioritising above cooling capacity or even brand choice, it's plenum depth and drainage design. Get those two things wrong and no amount of unit power fixes the outcome. Ask your installer to walk you through both before you sign anything, and treat a vague answer as a warning sign rather than a technicality.
— James
Book a survey with Frost Air Conditioning
Frost Air Conditioning is the option for homeowners across Exeter and the South West who want the placement questions above answered properly on site, not guessed at from a floor plan.

If you're weighing up whether your ceiling has the height, plenum depth, or drainage route for a cassette, the fastest way to find out is a proper survey rather than another guide. Visit the domestic installation page to book a free survey and get a placement plan specific to your room, drawn up by an engineer who'll be the one fitting it.
Manufacturer manuals worth keeping on file
Forward these to your installer, or ask them to confirm the specifics against your chosen unit's own documentation:
- FXKQ-MA installation manual (Daikin) covers height clearances, humidity insulation thresholds, and positioning jig procedures.
- VRF indoor installation sheets (MHI vendor PDF) sets out suspension bolt specifications and site hazard warnings.
- Mitsubishi Electric installation notes detail pipe insulation practice to prevent condensation drip.
Sources
- FXKQ-MA installation manual (Daikin)
- VRF indoor installation sheets (MHI / vendor PDF)
- Mitsubishi Electric installation notes (pipe insulation guidance)
FAQ
What are the disadvantages of ceiling cassettes?
Ceiling cassettes need adequate plenum depth above the ceiling line, typically more than 300mm of clearance for comfortable access to electrical and service points, which rules them out in some low-void properties. They also require professional installation for drainage and structural fixing, so they cost more upfront than a wall-mounted split and involve cutting into a finished ceiling.
How much space is needed in the ceiling for a one-way cassette AC?
A one-way cassette generally needs similar structural and drainage provision to a four-way unit, though its single-direction throw means placement against a wall is standard rather than an exception. Plenum depth requirements follow the same access rules, with under 300mm typically requiring a dedicated access door for the electrical connection.
Are ceiling cassettes a better option than wall-mounted mini splits?
Neither is universally better; it depends on ceiling height, room shape, and how the space is used. Ceiling cassettes suit open-plan rooms needing even four-way distribution from a single unit, while wall-mounted splits fit better in rooms below the roughly 2.5 metre minimum height that manufacturer manuals specify for cassette installation.
What does one-way ceiling cassette mean?
A one-way cassette is a ceiling-recessed unit that discharges air in a single direction rather than the four directions of a standard four-way cassette. It suits rooms where the unit sits against or near a wall, corridors, or spaces where a four-way throw pattern would be blocked by structural layout.
Do ceiling cassettes always need to be perfectly centred?
Centre placement is the manufacturer default for four-way units because it gives even airflow in all directions, as Daikin's own installation guidance confirms. Structural beams, drainage routes, or irregular room shapes can justify moving off-centre, but that decision should come from a proper site survey, not guesswork.